November 13, 2015

OBIEE 12c Installation on windows 7 64 bit

Hi All,

Please download the software from the URL's here or here.


Prerequisities:
1. Java
2. Oracle Database
3. FMW infrastructure executeble jar

4. OBIEE12c

I have downloaded it from the edelivery site.
After downloading and extracting the folders looks like the below screenshot. Please user 7-Zip extractor for extracting.


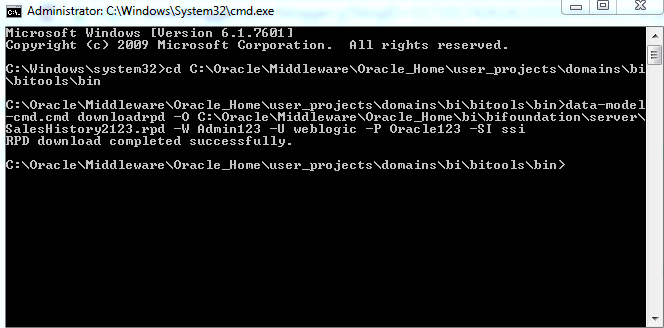
Run the command prompt as Administrator. The below is command to run the fwm_12.2.1.0.0.


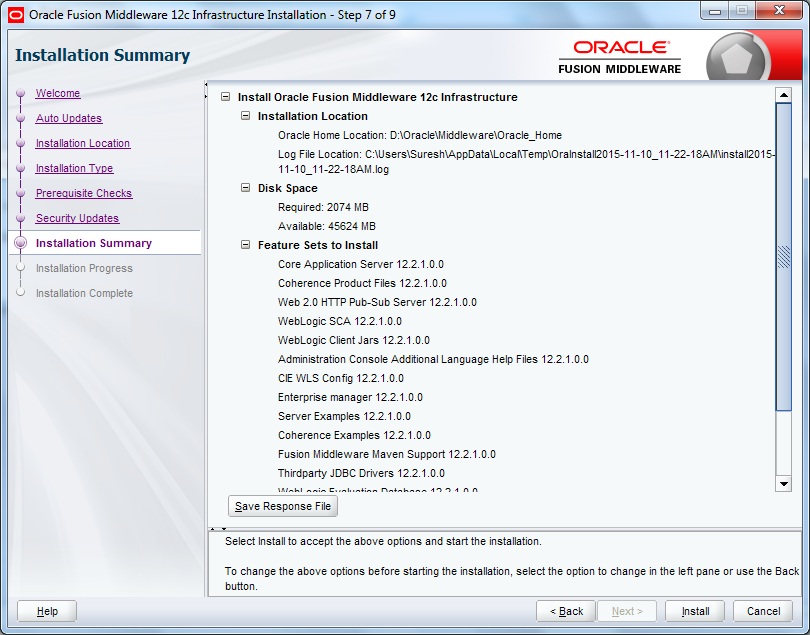
Now Please run the OBIEE 12c installer.


Click Next and Finish to complete OBIEE 12c Installation. Please run the Config.bat for the Domain Configuration.


The URL's for the weblogic,em and Answers looks like below.

http://localhost:9500/em--Enterprise Manager
http://localhost:9500/console-Weblogic
http://localhost:9502/analytics-Answers


Thanks
Krishna

November 4, 2015

OBIEE 12c RPD Upload and Download Commands


Hi All,

The below is the commands for the RPD upload and download in OBIEE 12c.

Open the command prompt as an Administrator.

Go to the path C:\Oracle\Middleware\Oracle_Home\user_projects\domains\bi\bitools\bin(based on your installation directory) in command prompt.

Upload:

data-model-cmd.cmd uploadrpd -I C:\Oracle\Middleware\Oracle_Home\bi\bifoundation\server\SalesHistory2.rpd -W Admin123 -U weblogic -P Oracle123 -SI ssi

Uploading RPD Path:C:\Oracle\Middleware\Oracle_Home\bi\bifoundation\server\SalesHistory2.rpd

Download:

data-model-cmd.cmd downloadrpd -O C:\Oracle\Middleware\Oracle_Home\bi\bifoundation\server\SalesHistory2123.rpd -W Admin123 -U weblogic -P Oracle123 -SI ssi

Downloading Path:C:\Oracle\Middleware\Oracle_Home\bi\bifoundation\server\SalesHistory2123.rpd


September 17, 2015

Connection pool properties in OBIEE11g


Connection pool properties:


Name:  

The name for the connection pool.A name is assigned automatically for connection pools created upon import

Permissions: 

This option we can use to assign permissions for individual users or application roles to access the connection pool.
This is feature is not intended to be used for data access security.For example connection pool permissions do not protect cache entries.

call interface: 

Identifies the application programming interface(API) with which to access the data source.Some dstabases can be access using native AIs, some use ODBC, and some work both ways.

Maximum connections: 

The maximum number of connections allowed for this connection pool.The default is 10.
The maximum value we will decide by the database model and the configuration of hardware for the computer on which the database runs, as well as the number of concurrent users who require access.

make sure to set 'Max connection' parameter appropriately.You can use following formula to calculate appropriate connections.

Max connections = Total number of users * 0.04 * Maximum number of reports on a Dashboard

Require fully qualified table names:

When this option is selected, all the physical query request will sent to database with fully qualified names.

For example: If you import DEPT table from DBO schema from ALH databese ...then qualified table name like
          select column_name from ALH.DBO.DEPT

without this option query request will sent to database like... select column_name from DEPT

Data source name :

This is nothing but TNS name of your database where Data warehouse user resides. It needs a valid logon information to connect to database.

Shared Logon :

 If this option is checked, it enables all users whose queries use the connection pool to access the database using the same user name and password.
If  not ..connections through the connection pool use the database user id and password specified in the user profile.

 Enable connection pooling:

It allows a single database connection to remain open for a specified time for future query request.Because of this connection pooling saves overhead of opening and closing a new database request for every query request.If this option is not selected each query sent to the database will open a new connection and it will impact on performance of the reports.

Timeout:

This parameter specifies time to remains open database connection after completing the request. By this time future requests uses this connection instead of opening new connection.

If you set this parameter value to zero (0),connection pooling will be disabled and it opens new connection to every request.

Use multi threaded connections:

When this option is checked Oracle BI Server terminates idle physical queries, these idle physical queries consumes memory.

Parameters supported:

If this option is selected, all the database parameters mentioned in the feature tab of the database object of the physical layer are supported by the BI server.


Isolation level:

Isolation level will controls the transaction locking behaviour.

There are 4 types of  levels.

1) Dirty Read

When this option is set,it is possible to read dirty or uncommitted data.

2) Committed Read

When this option is set, It will not read uncommitted data or dirty data.

3)  Repeatable Read

It places locks on all data that is used in query and prevent users from updating data into the data set.

4) Serializable 

It places a range locks and prevent users from updating or inserting rows into the data set until the transaction is complete.


Connection Scripts :

Click on Connection Scripts to learn 


Starting and Stopping OBIEE11g server using PUTTY (Server in Linux)


  To stop the BI Server:

        1.       Log in to 192.168.x.xx through putty

        2.       Go to the folder dev03/middleware2/instances/instance1/bin

        3.       Run command “ ./opmnctl stopall”

        4.       Stop managed server:

         Go to dev03/middleware2/user_projects/domains/bifoundation_domain/bin/

         And run below command.

         “./stopManagedWebLogic.sh bi_server1 t3://192.168.x.xx:7001  weblogic weblogic1” 

        5.       Stopping weblogic server:

          Go to dev03/middleware2/user_projects/domains/bifoundation_domain/bin/
          And run below command.
         

          “./stopWebLogic.sh”


To start the BI Server:
        
      1.       Start Weblogic

Go to Go to dev03/middleware2/user_projects/domains/bifoundation_domain/bin/
And run 

“nohup ./startWebLogic.sh -Dweblogic.management.username=weblogic -Dweblogic.management.password=weblogic1 &”

2.       Start Node manager
 Go to dev03/middleware2/ wlserver_10.3/server/bin/
And run below command

“nohup ./startNodeManager.sh > NOD.out &”

      3.       Start Managed server
Go to dev03/middleware2/user_projects/domains/bifoundation_domain/bin/
And run below command
nohup ./startManagedWebLogic.sh bi_server1 t3://192.168.x.xx:7001 > bis1_startup.log & 


       4.       Start opmnctl
Goto dev03/middleware2/instances/instance1/bin
“./opmnctl startall”

You can see below output after running this